Family Photography · Beginner Guide
How to Take Better Photos of Your Kids: A Parent’s Guide
Practical tips for capturing real smiles, fast-moving children, beautiful natural light and family memories—with a smartphone or a basic camera.
Introduction: Capture Childhood as It Really Feels
The best photographs of your children rarely begin with a perfect pose. They happen while a toddler investigates a puddle, a baby reaches for a familiar face, or a teenager laughs at a joke nobody else understands. Those everyday scenes tell a story that a carefully arranged smile often cannot. You do not need a professional camera to capture them. A phone, a little attention to light, and a few repeatable habits can make a noticeable difference. This guide focuses on photographs that look natural, feel personal, and remain meaningful years later. Start by choosing one simple goal for your next outing: capture an expression, a relationship, or a small detail. Trying to document everything can make you miss the moment in front of you.
Stop Asking for “Cheese”
When children hear “say cheese,” they often freeze, turn toward the camera, and produce a smile that disappears a second later. Instead, give them something to do. Ask them to show you their favorite toy, race to a tree, tell you a funny story, or demonstrate how high they can jump. Keep your camera ready while the activity unfolds. Ask questions rather than directing expressions: “What happened next?” or “Can you show me?” Genuine reactions follow naturally. Photograph the moments before and after the expected action, too. The anticipation before a birthday candle is blown out and the delighted reaction afterward may be stronger than the candle-blowing photograph itself. If a child is uncomfortable being photographed, put the camera away. A good memory matters more than a picture.
Find Beautiful Light Without Buying Equipment
Natural light is often the easiest way to improve family photos. Indoors, position your child near a window and let the light fall across their face from the side or at a slight angle. Turn off harsh overhead lighting if it creates mixed colors or dark eye sockets. You do not need to face the window directly: a little side lighting adds shape while keeping the expression visible. Outdoors, look for open shade under a porch, beside a building, or beneath a tree with even coverage. Avoid patchy sunlight that creates bright spots across a face. At midday, a shaded location is usually easier than direct sun. During the early morning or late afternoon, softer light can make skin tones and backgrounds look gentle. If you photograph toward a bright window or sunset, tap the child’s face on your phone screen and adjust exposure so the face is not lost in shadow. Watch the highlights: once a white shirt or forehead is completely blown out, editing may not recover the detail.
Get Down to Their Eye Level
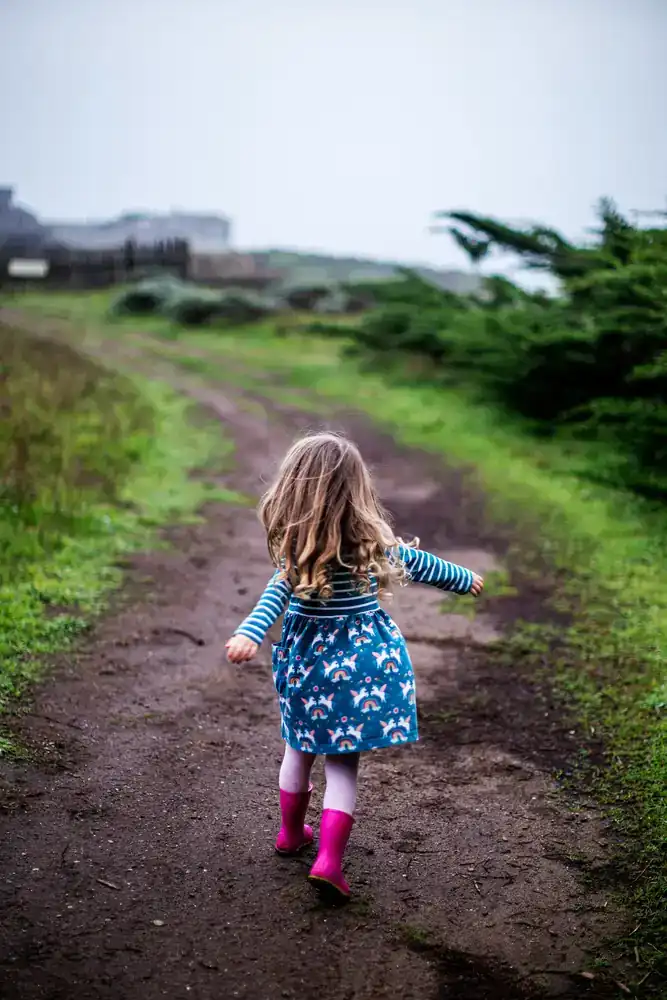
One of the simplest composition changes is to crouch or kneel. From an adult’s standing height, a child may look small against a busy floor. At eye level, you see their expression and the world as they experience it. Focus on the nearest visible eye when the face is the subject. On a phone, tap the eye or face; on a camera, use face or eye-detection autofocus if available. Leave enough space around hands, feet, and toys when they help explain the action. Try both portrait and landscape orientation. Portrait framing works well for a single child, while landscape framing can show siblings playing together or the setting of an adventure. You can also photograph from behind or above when that viewpoint tells the story—there is no rule that every image must show a face.

Clean Up the Background in Seconds
A strong expression can disappear into a distracting background. Before taking the photo, glance at the edges of your frame. Move one step left or right to hide a trash bin, bright sign, or cluttered shelf behind your child. Changing your angle is often faster than tidying the entire room. Look for a simple wall, a row of trees, a doorway, or a patch of sky. If you use portrait mode on a phone, check the preview for strange blur around hair, fingers, and toys. Artificial background blur is optional; a clean composition is more important. On a camera with a wide-aperture lens, keep enough depth of field for both eyes to be sharp, especially when your child turns sideways.
Camera and Phone Settings for Moving Kids
Children move quickly and unpredictably, so sharpness depends on more than megapixels. For walking, gestures, and ordinary play, begin around 1/250 second if your camera allows manual shutter control. For running, jumping, or sports, try 1/500 to 1/1000 second and adjust according to the light. A faster shutter needs more light or a higher ISO; a slightly grainy sharp image is often preferable to a clean but blurred one. Use continuous autofocus (AF-C or AI Servo, depending on the brand) and face/eye tracking where available. Continuous shooting or burst mode increases your chances of catching the exact expression. Take short bursts rather than hundreds of nearly identical frames. On phones, tap to focus, use burst mode where supported, and avoid digital zoom when you can safely move closer. In dim rooms, move toward a window instead of relying on a flash aimed straight at a child’s face. If your phone offers a motion or action mode, test it beforehand—some modes crop the image or need plenty of light.

Photographing Babies: Comfort First
Babies change quickly, and small details can be especially meaningful: a hand wrapped around a finger, sleepy eyelashes, or a familiar blanket. Choose a comfortable time when the baby is fed and settled. Soft window light works beautifully for quiet moments on a safe, stable surface. Never place a baby in an unsafe pose or elevated location for a photograph, and do not leave a baby unattended near props or equipment. Ask another adult to help when necessary. Photograph caregivers holding the baby, too. These images show scale, connection, and the people who were present. Keep sessions short and stop when the baby needs attention. Avoid shining strong lights or flashes into a baby’s eyes.
Toddlers and Preschoolers: Follow the Action
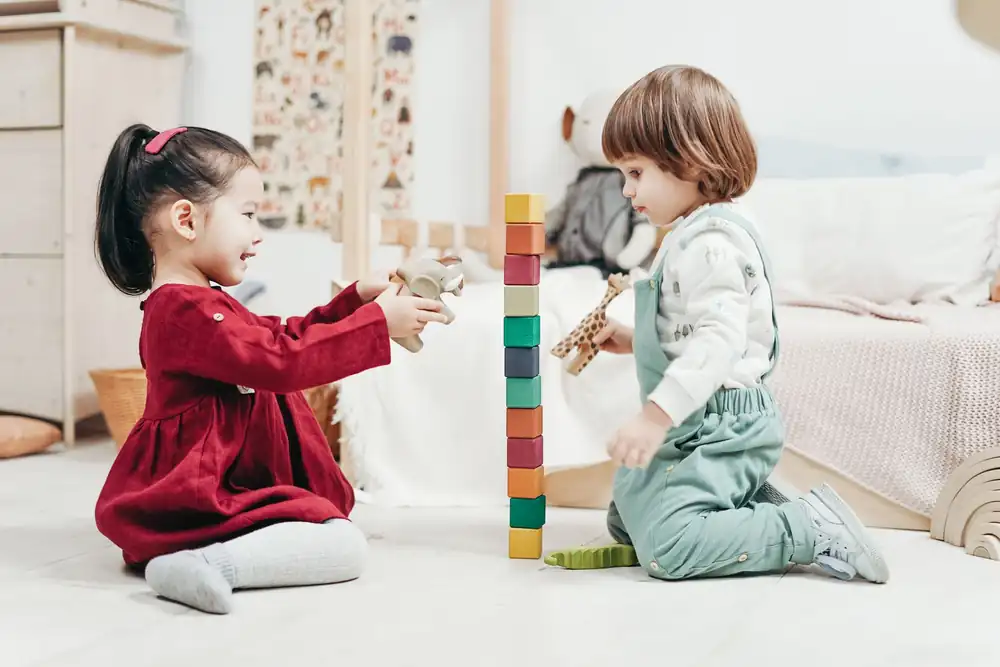
Toddlers rarely stay where you put them, so plan for movement rather than resisting it. Choose an activity with room to explore: building blocks, blowing bubbles, drawing, or walking through a park. Set your camera before the action starts. With a basic camera, shutter-priority mode at 1/500 second can be a helpful starting point outdoors. If the camera increases ISO automatically, check a few images to make sure the exposure still looks natural. With a phone, shoot in good light and use short bursts during predictable moments such as a jump or a hug. Let the child lead. Their curiosity often creates stronger pictures than a detailed posing plan. Photograph the wider scene, then move closer for hands, expressions, and details.
School-Age Children: Tell the Whole Story
As children grow, their interests become more specific. Photograph the preparation as well as the result: tying shoes before a game, arranging art supplies, or concentrating on a science project. These images build a fuller story than a single portrait. Give children a little control. Ask what they would like photographed, show them a preview, and let them suggest a location or pose. For group activities, watch how children interact with each other rather than always calling everyone toward the camera. When photographing school events or other children, respect venue rules and other families’ privacy. Ask permission before sharing identifiable images of anyone else’s child.
Teenagers: Respect Their Boundaries
Teenagers may be more self-conscious about cameras and online sharing. Invite collaboration rather than insisting on a photograph. Ask whether they prefer a candid image, an environmental portrait with a hobby, or no picture at all. Explain where the photograph will be stored and whether you intend to share it. A teen who feels respected is more likely to participate. Try simple, flattering light and avoid taking photos from very close distances with a wide-angle phone lens, which can distort facial features. Step back a little and use the phone’s standard lens or a modest optical telephoto setting if available. Let them review the images and have a say in which ones are kept or posted.
Five Photos That Make a Complete Family Story
Think like a storyteller rather than collecting only portraits. For an afternoon at the park, capture five kinds of images: a wide photograph showing the location; an action shot of the main activity; a close-up of an expression; a detail such as muddy shoes or small hands; and a connection moment between family members. This sequence works for birthdays, holidays, ordinary breakfasts, and rainy days at home. Take a few frames of each, then return to enjoying the experience. The goal is a small, varied collection, not constant recording.

Common Problems and Quick Fixes
If faces are dark against a bright sky, move into open shade or adjust exposure for the face. If every photo is blurry, increase shutter speed, find brighter light, or steady your phone with both hands. If autofocus chooses the background, tap the eye or enable subject tracking. If the background is cluttered, change your angle before changing lenses. If children look stiff, stop asking for a smile and give them a playful task. If colors look strange indoors, avoid mixing daylight with strongly colored lamps. If burst mode produces too many images, use shorter bursts and choose favorites soon afterward. Review a few photos on a larger screen when possible; a small phone display can hide motion blur.
Organize, Back Up, and Protect Your Photos
Great family photographs are only valuable if you can find and keep them. After an outing, mark a handful of favorites and delete obvious duplicates or accidental shots. Organize images by year and event, such as “2026-11 Park Afternoon,” or use albums in your phone’s photo app. Keep original files when possible; repeated exports through messaging apps can reduce quality. Follow a practical 3-2-1 backup approach: keep three copies of important photos, on two kinds of storage, with one copy off-site or in a reputable cloud service. Turn on automatic backup if it suits your privacy preferences, and occasionally confirm that files can actually be restored. Consider a small printed photo book each year. Before posting children’s images online, think about location clues, school uniforms, names, and whether the child would want the image public later.
A Simple Practice Plan for This Weekend
Choose one everyday activity and spend ten minutes practicing. First, find soft light and clear the background. Next, take one photograph at eye level, one wider image, and one close-up. For movement, try burst mode or a shutter speed of at least 1/250 second in suitable light. Then put the camera down and enjoy the activity. Later, select just three images that together tell the story. Notice what worked: the light, the timing, the angle, or the expression. Repeat next week with one small improvement. Consistency matters more than expensive equipment, and the most meaningful photographs are often the ones that preserve ordinary life.
Next step: Try photographing one ordinary moment today. The best image is the one that helps you remember how it felt.